
Little Giant condensate pumps are float-activated mini-pumps (115V or 230V, 50-80+ GPH) that automatically lift condensate water from air conditioners, boilers, and dehumidifiers to an overhead drain line when gravity drainage isn’t an option.
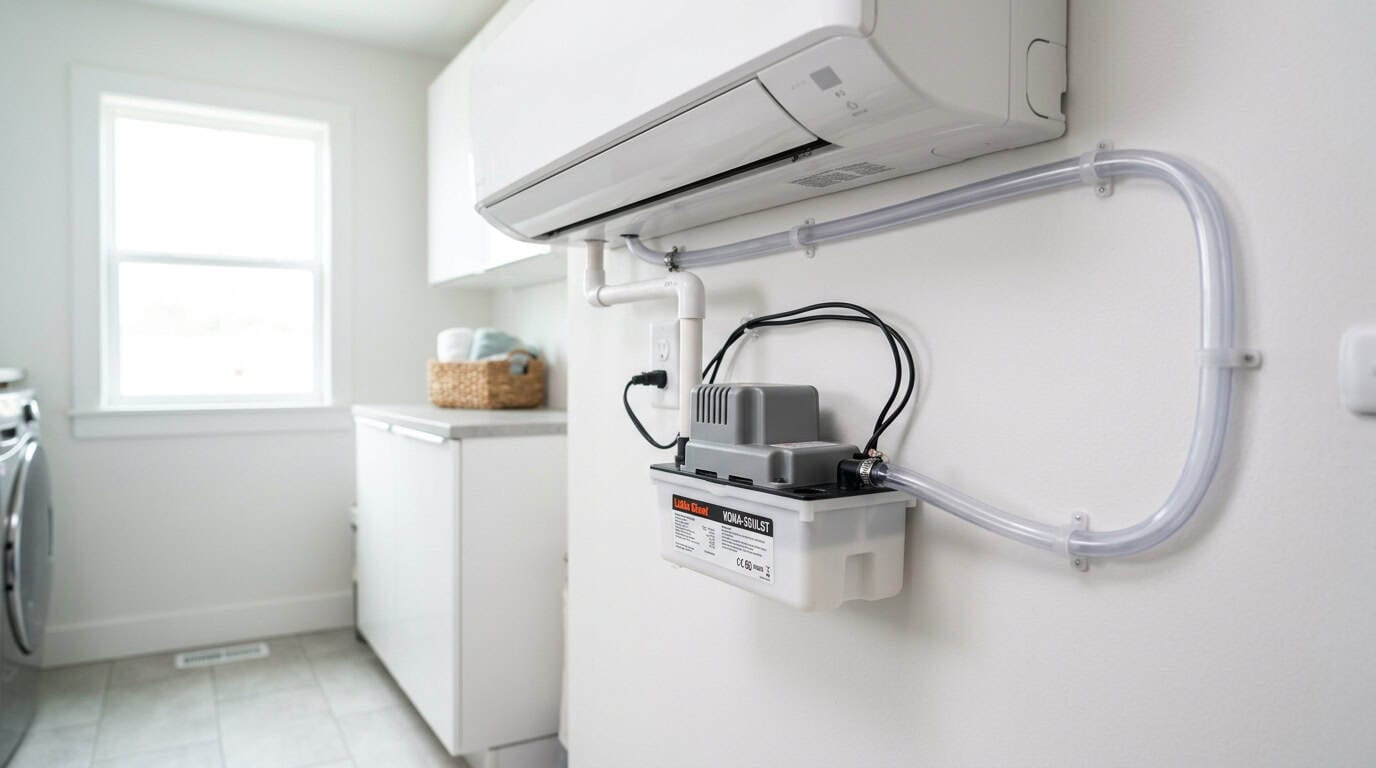
Take a finished basement AC install. The nearest floor drain sits twelve feet up a utility wall. A condensate line won’t run uphill, so the technician grabs a little giant condensate pump, tucks it under the air handler, and wraps the job in twenty minutes. That’s what this pump was built for. But not every model handles the same loads, and a unit that’s sized wrong or installed carelessly will run non-stop, overflow, or fail before the first cooling season ends.
This guide covers the full Little Giant condensate pump lineup, correct installation, diagnostic steps for common failures, and maintenance. If you’re picking a model, jump to the comparison table. If your pump is already giving you trouble, go straight to troubleshooting.
What is a Little Giant condensate pump?
A Little Giant condensate pump is a small electric pump that moves condensate water (the moisture that accumulates during air conditioning, dehumidification, boiler operation, or refrigeration) from a collection reservoir to a drain location that gravity alone can’t reach.
Most HVAC equipment produces condensate as a by-product of normal operation. A central air handler can generate 5-20 gallons per day depending on humidity levels, per guidance from the U.S. Department of Energy on air conditioning efficiency. When the condensate pan sits below the nearest drain outlet, options are limited: run an impractical drain line, or install a condensate pump. Little Giant’s VCMA series handles the second option.
How the float switch triggers the motor
When water enters the pump’s reservoir and rises to a preset level, a float, a lightweight plastic buoy, lifts with it. Once the float reaches the trigger point, it closes a micro-switch that energizes the pump motor. The motor drives an impeller that pushes water through a small-diameter discharge tube (usually 3/8″ OD) up to the drain outlet. When the reservoir empties enough to lower the float, the switch opens and the motor cuts off. This on/off cycle repeats every time the connected equipment produces enough condensate to fill the reservoir, often dozens of times per day.
Most Little Giant models include a secondary overflow safety switch set slightly above the primary float. If the pump fails and condensate keeps filling the reservoir, the overflow switch triggers a secondary circuit that shuts off the HVAC equipment before water spills. Without that wiring, a pump failure in a finished ceiling space means water damage before anyone notices.
Gravity drain vs. condensate pump: when you actually need one
Not every installation needs a condensate pump. If your air handler’s drain pan sits above a floor drain with enough pitch, gravity is cheaper, quieter, and more reliable. A pump adds one more component that can fail.
| Factor | Gravity Drain | Little Giant Condensate Pump |
|---|---|---|
| Drain outlet location | Below the condensate pan | Above or level with the pan |
| Installation complexity | Low: sloped PVC to floor drain | Moderate: pump, tubing, wiring, overflow switch |
| Ongoing cost | None | Electricity (~10-20W), periodic cleaning |
| Failure risk | Pan overflow if line clogs | Pan overflow if pump fails and safety switch is skipped |
| Best scenario | Basement floor drain below the unit | Finished ceiling, attic, or closet install with no low drain access |
If gravity works for your layout, use it. If it doesn’t, a Little Giant condensate pump is the default choice for most HVAC contractors in North America.
Little Giant condensate pump models compared
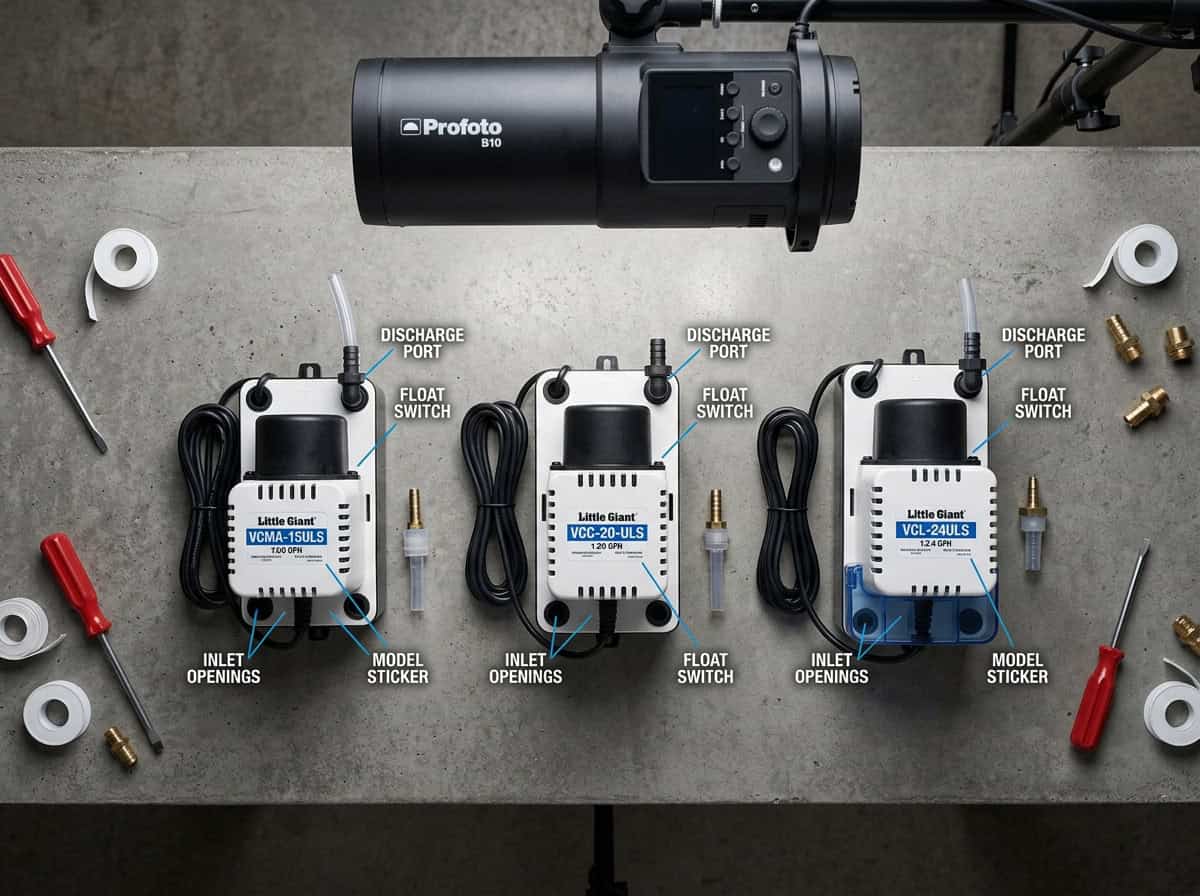
Little Giant’s condensate lineup centers on the VCMA (Vertical Compact Motor Assembly) series. The core models differ by voltage, flow rate, and switch configuration, not radically in design, but enough that picking the wrong one creates problems down the road.
VCMA-15ULS vs. VCMA-20ULS vs. VCMA-20ULST: what the generations changed
The VCMA-15ULS (part number 554401) is the entry-level 115V model. It delivers approximately 50 GPH at zero lift and drops off as discharge height increases. Reservoir capacity sits around 0.18 gallons. Float and overflow switches are both included. For light-duty residential applications (a small mini-split or a dehumidifier with moderate condensate output), this is usually sufficient.
The VCMA-20ULS (554425) steps up to approximately 80 GPH at zero lift and maintains useful flow up to around 20 feet of head. Same 115V input, same footprint, slightly more powerful motor. That extra capacity shows up when handling larger condensate loads: multi-zone systems, larger air handlers, commercial refrigeration in warm climates. Most residential installations that aren’t pushing condensate through long horizontal runs or significant vertical lifts will work fine with either model, but the 20ULS is the better default.
The VCMA-20ULST (554405) is electrically identical to the VCMA-20ULS except it runs on 230V. This exists primarily for commercial refrigeration applications and older European-spec equipment. If your service panel sends 230V to the condensate pump location (common in commercial kitchens, cold storage rooms, and some European residential installs), this is your model. On a 115V circuit, it won’t run.
A fourth variant the related searches surface: the 554630 (VCMA-20P). This is a newer iteration with a redesigned pump head and updated float switch mechanism. Specifications line up closely with the VCMA-20ULS, but the physical layout differs. Confirm dimensions before retrofitting into an existing mounting bracket.
115V vs. 230V: which voltage do you order?
Check the equipment installation manual for the condensate connection point. Residential central AC equipment in North America almost universally runs low-voltage accessories (including condensate circuits) on 115V. Go with the VCMA-20ULS.
Commercial refrigeration (walk-in coolers, freezer cases, display cases) often operates at 208-240V across the board, making the VCMA-20ULST the right call. When in doubt, check the voltage at the nearest outlet in the mechanical space. A standard 5-15R outlet with two blades and a ground pin means 115V. A 6-20R or larger plug means 230V; verify with a meter before ordering.
Flow rate, tank volume, and maximum head pressure by model
| Model | Part No. | Voltage | GPH at 0 ft | GPH at 15 ft | Max Head | Tank Capacity | Switch Type |
|---|---|---|---|---|---|---|---|
| VCMA-15ULS | 554401 | 115V | ~50 GPH | ~25 GPH | ~20 ft | 0.18 gal | Float + overflow |
| VCMA-20ULS | 554425 | 115V | ~80 GPH | ~55 GPH | ~20 ft | 0.18 gal | Float + overflow |
| VCMA-20ULST | 554405 | 230V | ~80 GPH | ~55 GPH | ~20 ft | 0.18 gal | Float + overflow |
| VCMA-20P | 554630 | 115V | ~80 GPH | ~55 GPH | ~20 ft | ~0.18 gal | Float + overflow |
Specifications per manufacturer documentation, approximate typical-use figures. Actual performance varies with tubing length, fittings, and ambient temperature.
Where Little Giant pumps are used: HVAC applications
Little Giant condensate pumps handle condensate from any cooling or dehumidification process, not just air conditioning. Knowing where yours fits helps with sizing and installation planning.
Central air conditioning and air handlers
Central AC coils produce the most condensate of any common residential application. At peak summer load, a 3-ton air handler can generate 12-18 gallons of condensate per day, depending on indoor humidity. According to ENERGY STAR’s guidance on air conditioner efficiency, systems operating in humid climates work harder to remove moisture, generating more condensate in the process.
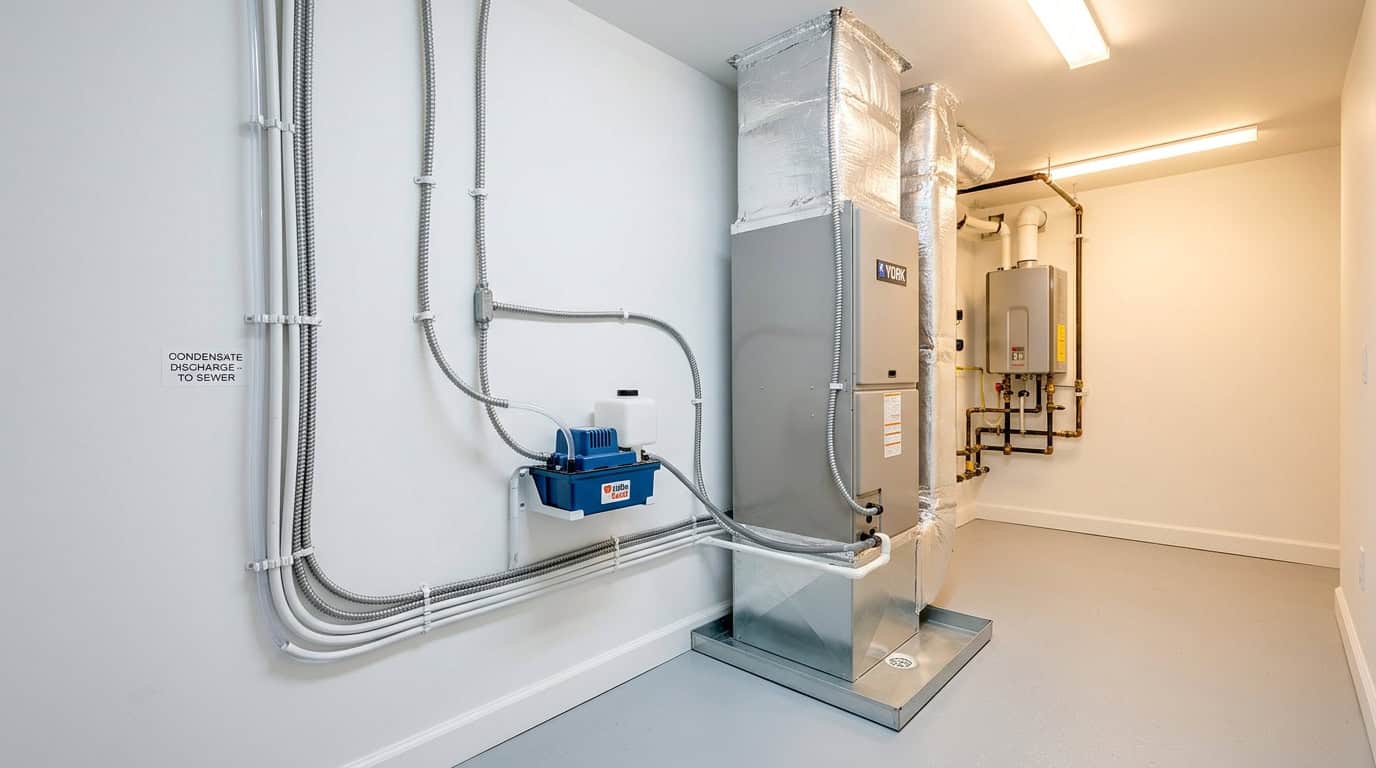
For a central air handler, mount the little giant condensate pump directly below the secondary condensate pan, or inline in the condensate drain line before it hits the wall. Use 3/8″ vinyl tubing from the pump’s discharge to the drain outlet. The overflow switch should wire into the equipment’s low-voltage control circuit so a pump failure shuts off the system before the secondary pan fills. The evaporator coil, where condensate actually forms, is directly tied to how much load the pump handles. Domirefrigeration’s evaporator coil resources cover how coil design and refrigerant type affect condensate production rates.
Mini-split and ductless systems
Mini-splits present a real constraint: the indoor unit often mounts high on a wall, and the built-in gravity drain doesn’t always reach a suitable outlet, especially in interior rooms. Some mini-split brands include a built-in lift pump, but most don’t.
For wall-mounted mini-splits, a slim-profile inline condensate pump may be a better physical fit than the VCMA series. For floor-console or ceiling-cassette mini-split units, a standard VCMA-20ULS works well and is easier to service than the proprietary inline alternatives.
Boilers, high-efficiency furnaces, and dehumidifiers
High-efficiency condensing gas furnaces are a frequently overlooked condensate source. When flue gas temperatures drop below about 140 degrees F, water vapor condenses in the heat exchanger. A 90+ AFUE furnace can produce 1-3 gallons of condensate per day during heating season. This condensate is slightly acidic (pH 3-5), which matters for tubing selection: use UV-resistant vinyl or polypropylene. Clear braided tubing degrades from the acid over a single heating season.
Dehumidifiers running in a crawl space or basement may also route through a little giant condensate pump when the collection location sits below the drain point. The VCMA-15ULS is typically sufficient here since dehumidifiers produce condensate more slowly than air handlers under peak load.
How to install a little giant condensate pump (step-by-step)
A correct installation takes under an hour. Done wrong, the pump either fails to prime, short-cycles without removing water, or overflows the first time it runs under load.
Tools, materials, and pre-install checks
You’ll need: 3/8″ OD vinyl tubing (condensate-grade, UV-stabilized), tube cutter or sharp utility knife, adjustable wrench, wire strippers, wire nuts or push-in connectors, a drill with a 7/16″ bit for the wall penetration, and Teflon tape for threaded fittings. The pump ships with discharge tubing included. Verify it reaches your drain outlet before starting.
Pre-install checklist:
– Confirm the voltage at the mounting location matches your pump model
– Verify the discharge outlet (floor drain, condensate drain line, utility sink) is accessible and clear
– Measure vertical lift from pump reservoir to discharge outlet; stay within the model’s max head rating
– Confirm the overflow switch terminals match your equipment’s control board input (typically R-C or R-Y depending on brand)
Mounting, inlet plumbing, and discharge line routing
Most little giant condensate pump models have two base mounting tabs. Screw them into the mounting surface (a drip pan, equipment base, or small shelf) so the unit can’t vibrate free during operation. The reservoir inlet port faces up; the discharge barb faces the wall or ceiling depending on your routing.
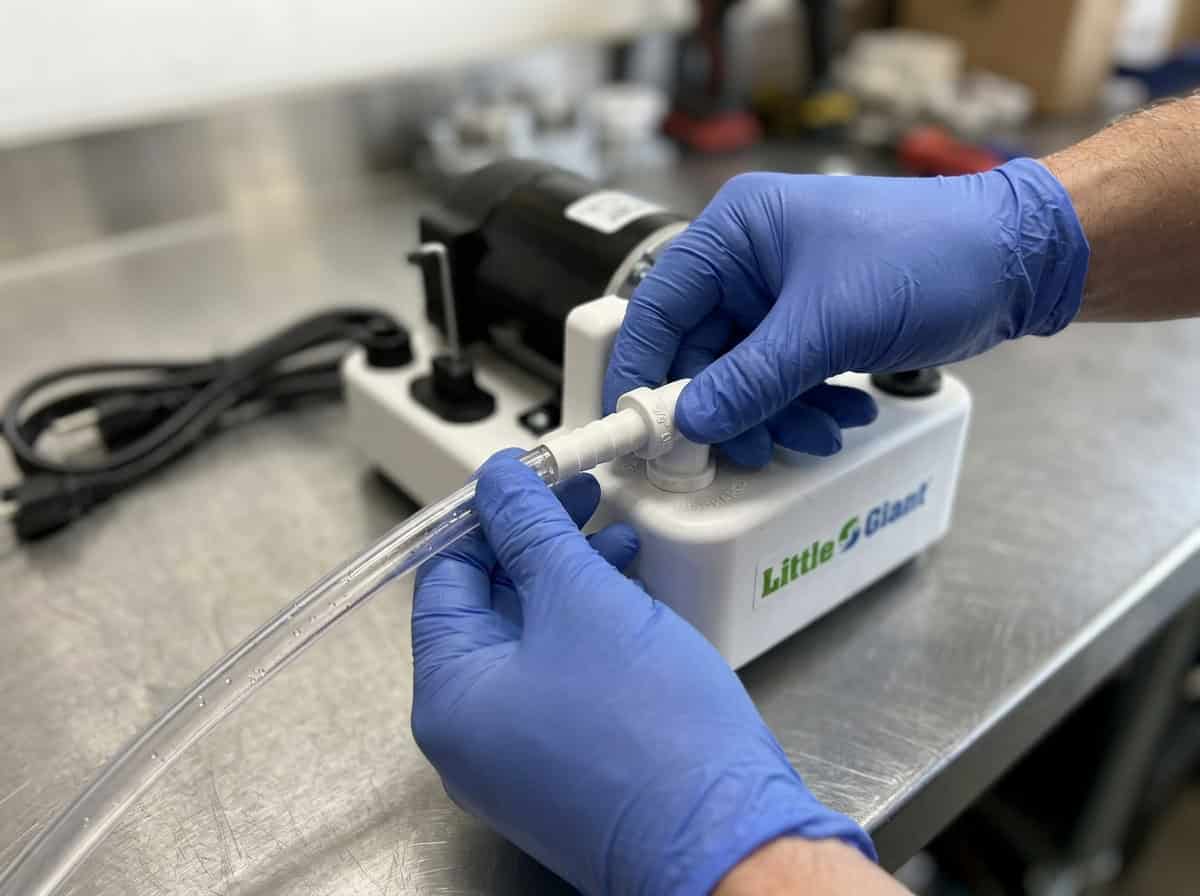
For inlet plumbing, connect the condensate drain outlet from the air handler’s secondary pan directly to the pump reservoir’s inlet fitting. A 3/4″ PVC male to 3/8″ barb adapter is a common size. Keep this connection clean and accessible; it’s where you’ll pour diluted bleach during quarterly maintenance.
Keep the discharge tubing as short and direct as possible. Every horizontal foot adds friction loss; every 90-degree fitting costs roughly 1 equivalent foot of head pressure. If your run includes long horizontal sections before the final vertical rise, use the VCMA-20ULS rather than the 15 model. Refrigerant-side pressure concepts are covered in Domirefrigeration’s condenser coil guides, and the same friction loss principles apply to condensate discharge lines.
Electrical connections and overflow switch wiring
The VCMA series uses a standard 115V power cord included in the box. Plug it into the nearest outlet on a circuit that stays live while the equipment runs. Do not wire the pump through the equipment’s on/off control circuit; the pump needs to run during equipment startup and brief cycling even if the control board isn’t actively calling for cooling.
The overflow switch is where most installers cut corners. It’s a dry contact pair of wires (labeled “overflow” on the terminal strip inside the pump access panel) that should interrupt the 24V control circuit feeding your HVAC equipment’s Y (cooling call) or G (fan) terminal. When the overflow switch opens because the pump failed and water is rising, the control board loses its 24V signal and shuts the system down before water overflows. Without this wiring, the overflow is purely passive. If nobody notices the pump has failed, the secondary pan fills and water damage follows.
The ASHRAE Handbook on HVAC Applications specifically addresses condensate system design standards and overflow protection requirements in applications where water damage risk is elevated.
Five installation mistakes that cause pump failures
- Discharging into a vent stack without a trap. Without a P-trap on the discharge line, sewer gases back-flow into the equipment room. Always add a trap when discharging to a plumbing vent or drain.
- Running discharge tubing in loops or sags. Water pockets in the tubing prevent the pump from building pressure, causing short-cycling and accelerated motor wear.
- Mounting the pump below the equipment drain outlet without checking head pressure. If the discharge must rise more than the model’s rated head, the pump will struggle to prime.
- Skipping overflow switch wiring. The most common callback cause after a new install.
- Using non-condensate-grade tubing. Standard irrigation tubing kinks and degrades from acidic condensate. Condensate-specific vinyl or polypropylene from the first install prevents premature failures.
Troubleshooting little giant condensate pump problems
The most common little giant condensate pump problems fall into three categories: the pump runs but doesn’t move water, the pump runs too much, or it’s stopped working entirely. Each has a clear diagnostic path.
Why is my condensate pump running constantly?
A condensate pump that runs non-stop without emptying the reservoir usually traces back to one of three causes.
Clogged inlet screen or impeller. Algae, slime, and mineral deposits accumulate in the reservoir over time. The inlet screen, a small plastic mesh filter inside the reservoir, can block enough to starve the impeller. Pull the pump, remove the reservoir cover, and flush both the screen and impeller cavity with clean water and a diluted bleach solution (1 tablespoon per gallon of water).
Float stuck in the “on” position. The float switch can jam open due to debris, mineral scale, or a warped float arm. Remove the float assembly and test it by pushing it up and down manually with the pump plugged in. You should hear the motor start and stop. If the motor runs regardless of float position, the switch or its mechanism has failed.
Condensate production exceeds pump capacity. In a humid environment or with a system larger than the pump was sized for, the pump simply can’t keep up. Verify your VCMA model’s GPH rating against the condensate output rate. A 2-ton mini-split in a Florida summer can produce more condensate than a VCMA-15ULS can remove. Upgrade to the VCMA-20ULS.
How to know when your condensate pump has failed
A failed little giant condensate pump typically announces itself through one of these signs:
- Standing water in the reservoir that doesn’t drain while the pump is plugged in and the system runs
- AC system shutting down unexpectedly (overflow switch triggered; that means the safety wiring is doing its job correctly)
- Gurgling or grinding noise from the pump housing
- Visible water stains or moisture around the base of the pump
- Motor that runs but produces no flow (impeller failure, or motor running in reverse after incorrect rewiring)
Test the pump directly: disconnect the inlet tubing, pour water slowly into the reservoir by hand, and watch whether it activates the float and clears the water. If the motor hums but water stays put, the impeller is jammed or the discharge line is blocked.
How to test the float switch in 3 minutes
- Turn off the HVAC equipment but leave the pump plugged in.
- Slowly pour a cup of water into the pump reservoir while watching for motor activation.
- The motor should start before the water reaches the top of the reservoir; typically at about 75% capacity.
- Empty the reservoir and verify the motor stops.
- If the motor never starts with a full reservoir, bypass the float switch: carefully short the two switch terminals with a piece of wire. Motor runs after shorting means the float switch has failed. Motor still doesn’t run means the motor itself has failed.
A replacement float switch assembly for the VCMA series runs $8-15. A full pump replacement makes more sense if the motor has failed; repair labor typically exceeds replacement cost for these small units. The Little Giant VCMA-20ULST installation and testing video on YouTube demonstrates the manual-pour float test visually, useful if you’re doing this for the first time.
| Symptom | Most Likely Cause | First Fix |
|---|---|---|
| Runs constantly, reservoir doesn’t empty | Clogged inlet screen or impeller | Clean screen and impeller with diluted bleach solution |
| Float stuck, motor won’t stop | Float jam or switch failure | Manually move float to test; replace switch assembly |
| Motor runs, no water moves | Blocked discharge tubing | Clear discharge line; check for kinks or sags |
| Motor won’t run at all | Motor failure or blown fuse | Short float terminals to test; replace pump if motor dead |
| AC trips off via overflow switch | Pump failed, safety switch activated | Diagnose pump fault; overflow protection is working correctly |
| Short-cycling (starts/stops rapidly) | Sag or loop in discharge tubing | Re-route tubing to eliminate the low-point water pocket |
| Pump overflows without tripping shutoff | Overflow switch not wired | Wire overflow terminals to 24V control circuit |
| Grinding or crunching noise | Debris in impeller | Flush impeller; replace if impeller fins are chipped |
Maintenance schedule and lifespan
A little giant condensate pump that gets regular attention can last 5-10 years in residential service. In commercial refrigeration or high-humidity environments, expect 3-5 years before motor wear becomes an issue: the pump cycles far more frequently under those loads.
The EPA’s guidance on indoor air quality and moisture control identifies unchecked condensate as one of the primary drivers of mold growth in HVAC systems. Keeping the condensate pump working correctly matters beyond equipment protection. It’s directly tied to air quality in occupied spaces.
Quarterly cleaning: reservoir, inlet screen, and tubing
Every three months during active cooling or dehumidification season:
- Pour 1 cup of diluted bleach (1 tablespoon per gallon of water) into the reservoir inlet. Let it sit for 15 minutes, then power the pump to flush the solution through the discharge line. This kills algae and slime before they build into a clog.
- Remove the inlet screen (a snap-fit plastic mesh in the bottom of the reservoir) and rinse it under running water. Use a soft brush if mineral scale has hardened on the screen face.
- Inspect the discharge tubing for kinks, sag points, and algae growth inside the line. Hold one end up to a light source; if the interior is green or brown, flush with the bleach solution.
- Test the float switch by pouring water in by hand. Don’t assume it’s working just because the system appeared to drain normally. A partially stuck float can pass water while still failing at peak load.
Warranty coverage, replacement parts, and when to replace
Little Giant warranties their VCMA series pumps for 1-3 years depending on the model and purchase channel. The warranty covers manufacturing defects, not damage from improper installation, calcium buildup, or running dry.
Replacement parts available for the VCMA series include float switch assemblies, reservoir covers, check valves, and motor units on some models. For a pump that’s past warranty with a failed motor, replacement usually beats repair. A new VCMA-20ULS lists around $40-60, while a replacement motor assembly (when available) runs $25-35 plus labor. One exception: if the installation is hard to access and the pump body is otherwise sound, a $10 float switch assembly extends a working pump by several more years without a full replacement.
Condensate management trends (2026 and beyond)
Condensate pumps are a mature product category, but the surrounding ecosystem is changing. Two shifts worth tracking for anyone specifying or servicing HVAC systems in 2026.
Smart condensate pumps with IoT overflow alerts
The traditional float switch safety system shuts off the HVAC equipment when the pump fails, but it doesn’t tell anyone why, and it doesn’t send a notification. Connected condensate monitors address this. Products from Little Giant and competitors now send SMS or app alerts when the pump fails or the reservoir approaches overflow. In commercial installations, this matters: a condensate pump failing over a weekend in a finished ceiling space can cause serious water damage before anyone arrives Monday morning.
The integration point is usually a wireless sensor clipped to the reservoir or placed in the secondary drain pan, connected via Wi-Fi or Z-Wave to a building automation system or consumer smart home hub. The AHRI roadmap for HVAC system digitization includes condensate management as part of a broader push toward predictive maintenance across residential and commercial applications.
As refrigerant regulations tighten in 2026 and efficiency mandates under the Kigali Amendment implementation schedule increase, high-efficiency equipment will actually generate more condensate per day. Longer cycles and deeper dehumidification extract more moisture per operating hour.
Heat recovery and energy efficiency in modern systems
Condensate from high-efficiency furnaces (pH 3-5) is acidic enough to corrode copper and galvanized drain lines. The 2026 push toward polypropylene and CPVC in HVAC drain systems is driven partly by this chemistry. Some commercial refrigeration installations are also experimenting with condensate heat recovery: the water leaving a condensing unit carries slightly more heat than ambient, and in large commercial buildings, that energy is being captured for domestic hot water pre-heating. Niche in 2026, but growing in supermarket refrigeration.
| Trend | Current State (2026) | Likely Trajectory |
|---|---|---|
| IoT overflow alerting | Available, not standard | Spec requirement in commercial installs within 2 years |
| Condensate heat recovery | Niche: large commercial only | Expanding to mid-size commercial by 2028 |
| Acid-resistant drain materials | Growing adoption | Mandatory per updated codes for high-efficiency furnace installs |
| Smart pump auto-shutoff | Premium models only | Expected in mid-tier within 2 years |
FAQ: little giant condensate pump questions
Q1: How do I know my condensate pump is bad?
Standing water in the reservoir while the pump is plugged in and the system is running is the clearest sign. Pour water into the reservoir by hand. If the motor doesn’t activate within a few seconds, or activates but water doesn’t drop, there’s a fault. AC systems that trip off unexpectedly via the overflow circuit are also a sign: the safety system worked, but the underlying pump failed.
Q2: How much water does a little giant condensate pump hold?
The VCMA series reservoir holds approximately 0.18 gallons (about 0.7 liters). That’s the active volume before the overflow switch triggers. On a humid summer day, a 3-ton air handler can fill and empty that reservoir many times per hour. The pump doesn’t store condensate; it continuously cycles through it. Total daily condensate handled depends on load and humidity conditions, not the reservoir size.
Q3: How to test a little giant condensate pump?
Pour water slowly into the reservoir inlet with the pump plugged in. The motor should activate when the reservoir reaches roughly 75% capacity. If the motor doesn’t run, short the float switch terminals with a short piece of wire: motor runs after shorting means the switch failed; motor still doesn’t run means motor failure. Also clear the inlet screen and discharge line before condemning the pump. A clogged screen can prevent the float from lifting even with a full reservoir.
Q4: Why is my little giant condensate pump running constantly?
Three causes: (1) clogged inlet screen or impeller (the motor runs but can’t move water, so the reservoir stays full and the float stays up); (2) float stuck in the “on” position due to debris or scale; or (3) condensate production exceeds the pump’s capacity. Start with cleaning. If the pump clears after a bleach flush, organic buildup was the cause. If it clears after manually freeing the float, a mechanical float jam was the problem.
Q5: What is the difference between VCMA-15ULS and VCMA-20ULS?
Flow rate. The 15ULS delivers approximately 50 GPH at zero head; the 20ULS delivers approximately 80 GPH. For most single-zone residential AC installs, either works. The 20ULS is the better default: the higher flow rate keeps duty cycles shorter, which extends motor life, and the price difference is typically only $5-10. Choose the 15ULS only if footprint is the deciding factor and your condensate load is light.
Q6: Can I use a little giant condensate pump with a mini-split?
Yes. The VCMA-20ULS is compatible with most floor-console, ceiling-cassette, and horizontal-ducted mini-split indoor units. For high-wall mini-splits, the pump needs to sit on a shelf or in a pan below the unit with tubing running to the drain outlet. Some high-wall mini-splits in tight spaces prefer slim-profile inline lift pumps. Check whether the VCMA footprint physically fits before specifying it for wall-mount applications.
Q7: How long does a little giant condensate pump last?
5-10 years in residential service with quarterly cleaning. 3-5 years in commercial refrigeration with heavy cycling and more aggressive condensate chemistry. Pumps that run dry due to float switch failure (the motor runs continuously against an empty reservoir) fail much faster. Overheating is the primary accelerator of motor wear.
Q8: Does a little giant condensate pump need maintenance?
Yes: quarterly at minimum during active use season. Pour diluted bleach through the reservoir to kill algae, clean the inlet screen, and manually test the float switch. Annual maintenance should also include checking discharge tubing for kinks and verifying overflow switch wiring is intact. Skipping maintenance is the fastest route to a clogged pump that silently overflows a finished ceiling.
Choosing the right little giant condensate pump for your system
For most residential central AC installations in North America, the VCMA-20ULS (554425, 115V, ~80 GPH) is the right default. It handles more condensate than the 15ULS, the price difference is negligible, and the faster clearing speed means shorter motor duty cycles and longer service life. The only reason to choose the 15ULS is if you’re replacing an existing unit in a fixed mounting bracket where the smaller footprint is required.
Commercial and 230V applications go straight to the VCMA-20ULST (554405). Confirm voltage at the mounting location with a meter before ordering.
Whichever model you choose, two things matter more than the model itself: wiring the overflow switch to the 24V control circuit before the system goes live, and committing to quarterly bleach maintenance. A well-installed, well-maintained little giant condensate pump runs reliably for years without further attention. One installed without overflow wiring and never cleaned will cause a water damage call within two seasons. The pump hardware is reliable. The installation habits around it are where most failures begin. For the upstream refrigeration and cooling equipment that generates the condensate these pumps handle, Domirefrigeration’s residential refrigeration coil resources cover coil specifications and selection.